
How to start and use Spotify Group Sessions
[ad_1]
Read More/Less
Since May 2020, Spotify has been offering its Group Sessions feature for users. Restricted to those who use Spotify Premium, Group Sessions allow users to create joint music sessions where multiple users can listen to the same playlist simultaneously. Each player in the group then gets the ability to control playback and volume.
Almost a year later, the feature remains in beta but works well enough for most people. If you want to try out Spotify’s group sessions too along with your friends, here’s how to get started in a few easy steps.
How to start a Spotify Group Session
Step 1: Open Spotify and play a song
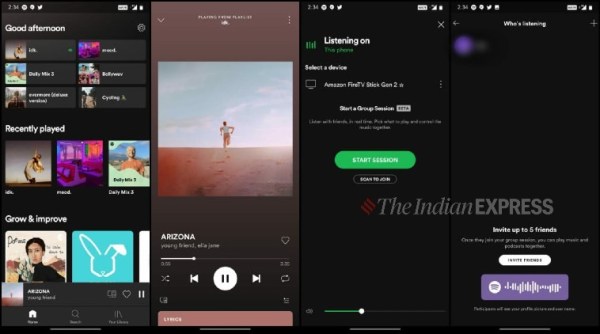
Before you add your friends, you need to start playing a song on Spotify. Play a song and go to the player interface page. This is where you can see the play/pause and the previous/next track buttons.
Step 2: Go to the ‘Devices’ page
Find the ‘Devices’ page icon on the bottom right. You would usually use this page to switch between controlling Spotify on your phone and your web player.
 Here’s how to use Spotify Group Sessions,
Step 3: Click on the ‘Start Session’
If you do have a Spotify Premium subscription, you should see the Spotify Group Session section below your current device(s). Here, click on the ‘Start Session’ button. You have now created a Spotify Group Session.
Step 4: Share your Group Session
Now that you have created your Group Session, you can share it with your friends. To do that choose your mode of sharing from the subsequent share screen. Your frequently used apps like WhatsApp or Telegram should show up here.
Once your friends have the shareable link, they can click on it to join in on your session. Once this is done other users are able to control the playback and can play any song or playlist.
[ad_2]